Is your Android phone acting up? Whether it’s dying before noon, running slower than a flip phone, refusing to charge, or throwing error messages you’ve never seen before — you’ve come to the right place.
This is the most complete Android troubleshooting guide on the internet. Every common Android problem is covered here, with real step-by-step fixes that work on Samsung Galaxy, Google Pixel, Motorola, OnePlus, and every other Android device in 2026.
Use the Table of Contents below to jump directly to your problem.
1. Android Battery Draining Fast
Battery drain is the #1 Android complaint in the US. If your phone is going from full to dead before the end of the workday, here are the most effective fixes.
Why It Happens
Your battery drains fast because of background apps running 24/7, screen brightness set too high, location services being accessed constantly, weak cell signal forcing your radio to work harder, and in older phones, a physically degraded battery that has lost capacity.
Top Fixes for Android Battery Drain
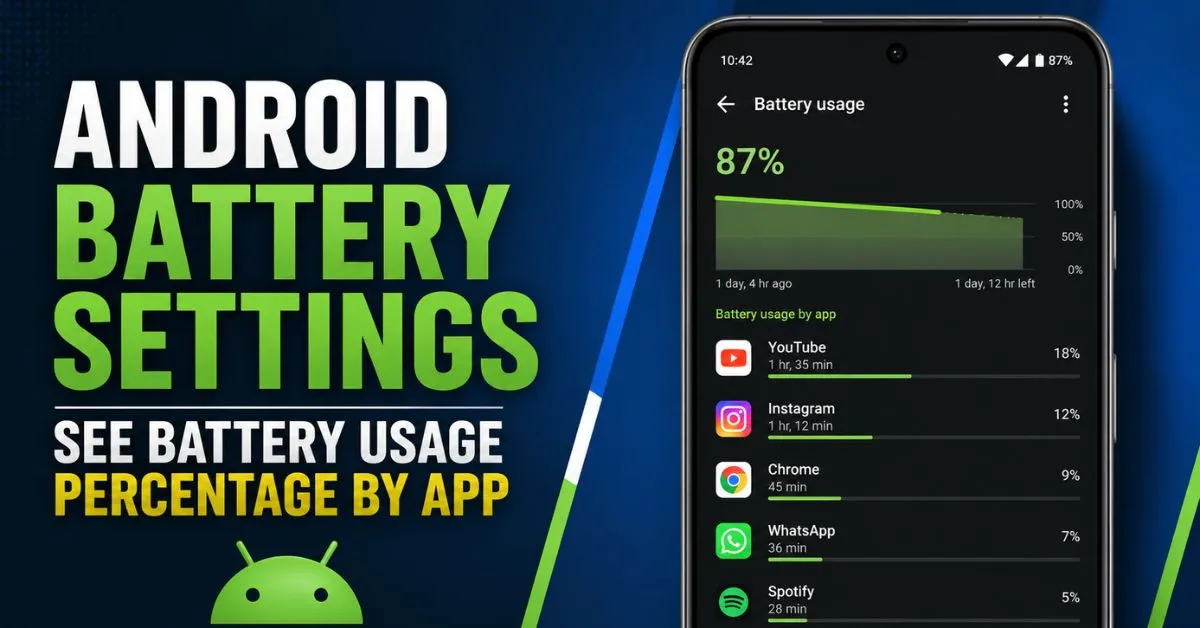
Fix 1 — Find the culprit app:
Go to Settings → Battery → Battery Usage. Any app using more than 15-20% of your battery is the problem. Social media apps like Facebook, Instagram, and TikTok are notorious battery killers. Uninstall them and use the mobile website instead, or switch to Lite versions.
Fix 2 — Stop background app activity:
Go to Settings → Apps → [App Name] → Battery → Restricted. Do this for every app you don’t need constant notifications from. On Samsung: Settings → Device Care → Battery → Background Usage Limits → enable “Put unused apps to sleep.”
Fix 3 — Reduce screen brightness:
Your screen uses more battery than anything else. Drop brightness to 40-50% and set screen timeout to 30 seconds or 1 minute. If you have a Samsung Galaxy or Pixel with an AMOLED screen, enable Dark Mode — black pixels use zero power on AMOLED, adding up to 1 hour of extra battery life per day.
Fix 4 — Disable location for unnecessary apps:
Go to Settings → Location → App Permissions. Change everything from “Allow all the time” to “Only while using the app.” This fix alone adds 1-2 hours of daily battery life.
Fix 5 — Turn off unused radios:
Bluetooth, NFC, and Wi-Fi scanning drain battery even when you’re not using them. If you’re on a 5G phone but not in a 5G area, go to Settings → Network → Preferred Network Type and switch to LTE/4G only — your phone wastes significant battery searching for a 5G signal that isn’t there.
Fix 6 — Enable Adaptive Battery: Go to Settings → Battery → Adaptive Battery and turn it on. This AI feature learns which apps you rarely use and limits their background battery usage automatically.
Fix 7 — Check battery health:
If your phone is 2+ years old, install the free AccuBattery app from Google Play. It shows your battery’s current capacity vs. original. If you’re below 80% capacity, a battery replacement ($50-80 at most repair shops) will feel like a brand new phone.
📖 Full Guide: Android Battery Draining Fast? 10 Settings to Change Right Now
2. Android Phone Not Charging
![]()
Your phone won’t charge. Or it charges incredibly slowly. Or it says “charging” but the percentage never moves. Here’s how to diagnose and fix every Android charging problem.
Common Causes
Dirty or damaged charging port, faulty cable or adapter, software bug preventing charging detection, moisture in the port, and battery calibration issues.
Step-by-Step Charging Fixes
Fix 1 — Clean the charging port:
This solves charging problems for the majority of users. Take a dry toothpick and gently remove any lint, dust, or debris from the bottom of your phone’s charging port. Do this carefully — don’t use metal objects. You’ll often pull out a surprisingly large ball of pocket lint that’s been blocking the connection.
Fix 2 — Try a different cable and adapter:
USB-C cables degrade over time and cheap cables often can’t deliver enough power. Try a different cable — ideally the original one that came with your phone, or a brand-name cable. Also try a different wall adapter. If your phone charges fine with a different cable, the original cable is the problem.
Fix 3 — Restart your phone:
Sometimes Android loses track of the charging state. A simple restart often fixes phantom charging issues where the phone shows charging but percentage isn’t rising.
Fix 4 — Fix the “Moisture Detected” error:
Samsung phones often show a “Moisture Detected” error even when the port is dry. Go to Settings → Battery and Device Care → Diagnostics → Phone Diagnostics and run a port check. Alternatively, leave the phone off for 30 minutes in a dry room, then try charging again.
Fix 5 — Check for software issues:
If charging works fine with the phone off but not when it’s on, there’s a software issue. Go to Settings → Apps → Google Play Services → Force Stop, then try charging again. Also check if a specific app is using 100% CPU in the background — this can generate heat that triggers charging protection circuits.
Fix 6 — Wireless charging alternative:
If your USB-C port is physically damaged but your phone supports wireless charging (most Samsung Galaxy phones and Pixels do), use wireless charging as a temporary solution while you get the port repaired.
Fix 7 — Won’t charge past 80%:
This is often intentional. Samsung and Pixel phones have a “Protect Battery” feature that limits charging to 85% to extend battery lifespan. Go to Settings → Battery → More Battery Settings → Protect Battery and disable it if you want 100% charges.
📖 Full Guide: Android Phone Not Charging? Try These Fixes Before Buying a New One
3. Android Phone Running Slow
Is your Android phone so slow it’s painful to use? Apps taking forever to open, animations stuttering, keyboard lagging — here’s how to make your Android phone fast again without buying a new one.
Why Android Phones Get Slow
Storage at 90%+ capacity, too many background apps eating RAM, heavy Android skin (Samsung One UI, Motorola My UX), animation effects that look nice but feel slow, and yes — sometimes a phone that’s 3+ years old genuinely needs a reset.
Proven Speed Fixes
Fix 1 — Free up storage:
When your phone’s storage is over 85% full, it struggles to write temporary files and slows down significantly. Go to Settings → Storage and check your level. Download Files by Google — it finds duplicate photos, large files, and app caches you can safely delete. Keep at least 20% of your storage free.
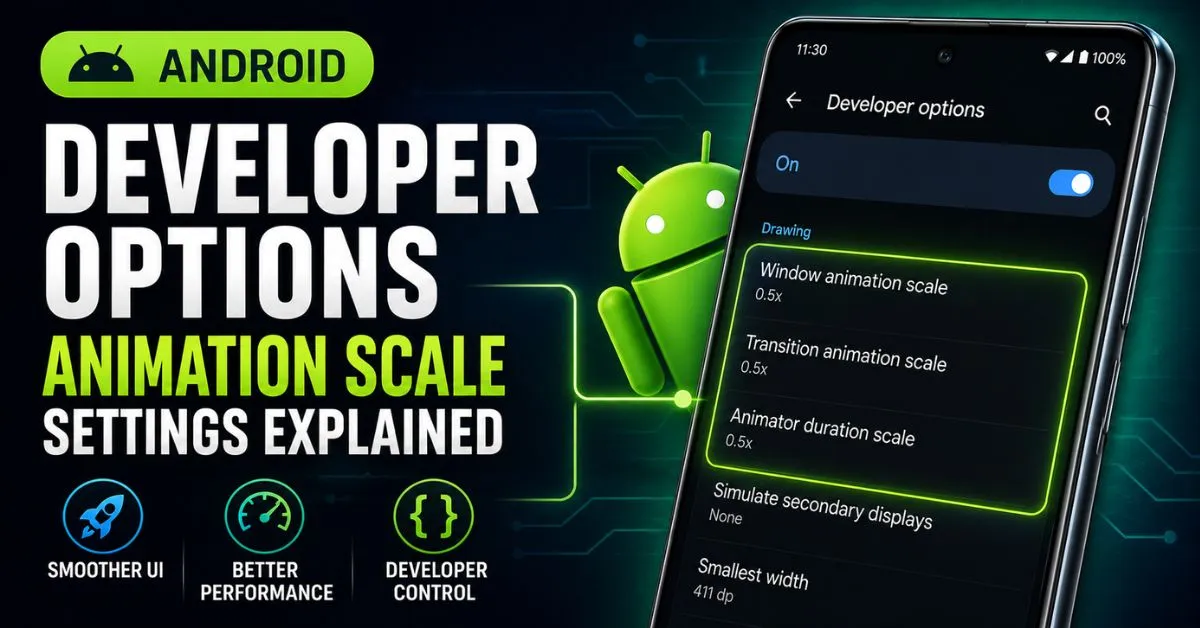
Fix 2 — The 0.5x animation hack (instant improvement): Go to Settings → About Phone and tap Build Number 7 times to unlock Developer Options. Then go to Settings → Developer Options and find:
- Window animation scale → set to 0.5x
- Transition animation scale → set to 0.5x
- Animator duration scale → set to 0.5x
Your phone will immediately feel twice as fast. This doesn’t actually make the processor faster — it cuts animation time in half, making everything feel snappier.
Fix 3 — Clear app cache:
Go to Settings → Apps → [Heavy App] → Storage → Clear Cache. Do this for your heaviest apps — Slack, Spotify, Instagram, YouTube. Never tap “Clear Data” unless you want to lose your login and settings.
Fix 4 — Stop vampire apps:
Some apps stay running in the background constantly. In Developer Options, tap Running Services to see exactly what’s using RAM right now. Put heavy background apps like Facebook into deep sleep via Settings → Battery → Background Usage Limits.
Fix 5 — Remove bloatware:
Carrier-installed apps (AT&T, Verizon, T-Mobile) and manufacturer apps run in the background eating resources. Go to your app list and disable (not uninstall) every app you didn’t personally install and never use.
Fix 6 — Use Lite app versions:
Switch from Facebook to Facebook Lite, from Twitter/X to the mobile website, and from the full Amazon app to Amazon’s mobile website via Chrome. These lighter alternatives use dramatically less RAM and make your phone feel faster immediately.
Fix 7 — Factory Reset (nuclear option):
If all else fails, a factory reset is the most effective speed fix. It wipes all accumulated “system cruft” — leftover files, corrupted databases, bad configurations — and makes your phone feel brand new. Back up photos to Google Photos and make sure you know your Google account password before proceeding.
📖 Full Guide: Why Is My Android Phone So Slow? 7 Real Fixes That Actually Work
4. Android Phone Overheating
![]()
An Android phone that gets hot is not just uncomfortable — it’s damaging your battery and can cause permanent hardware damage if left unchecked. Here’s what’s causing it and how to fix it.
What Causes Android Overheating
Background apps running at 100% CPU, charging while using heavy apps, direct sunlight exposure, poor phone case ventilation, outdated software with CPU management bugs, and in rare cases — malware mining cryptocurrency in the background.
How to Fix Android Overheating
Fix 1 — Remove the case temporarily:
Phone cases trap heat. If your phone is hot, remove the case and let it cool on a hard flat surface (not a bed or couch — fabric traps heat too).
Fix 2 — Close all background apps:
Swipe up to see all open apps and close everything. Then go to Settings → Battery → Battery Usage and look for any app using unusual CPU in the background.
Fix 3 — Stop charging while using heavily:
Using GPS navigation + charging + screen at full brightness is the perfect overheating storm. If you’re on a road trip, reduce screen brightness and consider a phone mount with ventilation.
Fix 4 — Check for malware:
If your phone is hot when you’re not using it, that’s a red flag. Open Google Play Store → Profile → Play Protect → Run Scan. Malicious apps that mine cryptocurrency are a known cause of constant overheating.
Fix 5 — Update your software:
Go to Settings → About Phone → Software Update. Overheating bugs in Android are commonly fixed in minor updates. Samsung in particular releases frequent patches for thermal management issues.
Fix 6 — Avoid direct sunlight:
Leaving your phone in a hot car or in direct sunlight is the fastest way to overheat it. Android phones are designed to operate between 32°F and 95°F (0°C to 35°C). Above 95°F, thermal throttling kicks in — the processor slows itself down to prevent damage.
Fix 7 — Samsung-specific fix:
Samsung phones have a Device Care feature that can diagnose overheating. Go to Settings → Device Care → Auto Optimization → Auto Restart. Also check if Samsung Dex or DeX mode is enabled accidentally — this mode runs the phone at maximum performance.
5. Android Screen Touch Not Working
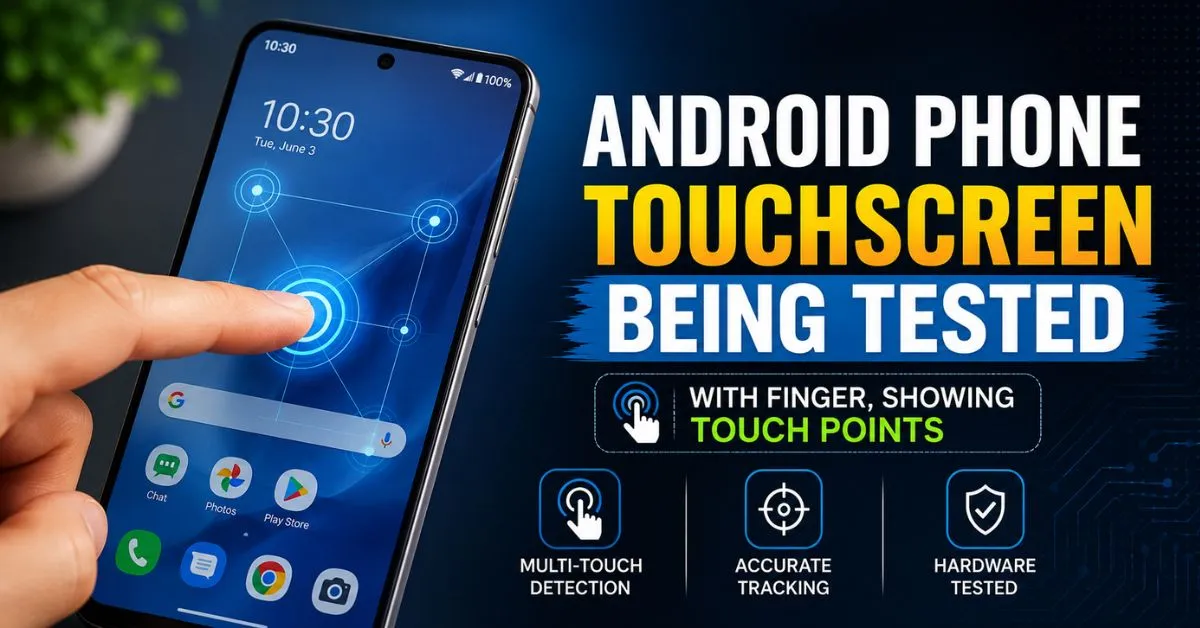
Your Android screen doesn’t respond to touches, responds in the wrong place, or randomly touches itself (ghost touch). Here’s how to fix every touchscreen problem.
Types of Touch Problems
- Screen completely unresponsive
- Touch response in wrong location
- Ghost touch (screen acts like it’s being touched when it isn’t)
- Touch only works in some areas
- Touch too sensitive or not sensitive enough
Touchscreen Fix Guide
Fix 1 — Clean the screen:
Oil, sweat, and moisture on the screen surface can interfere with capacitive touch. Wipe the screen thoroughly with a dry microfiber cloth. If you have a screen protector, check if it’s lifted at the edges — a partially detached screen protector is the #1 cause of random touch issues.
Fix 2 — Remove the screen protector temporarily:
If touch is erratic, remove your screen protector completely and test. If touch works fine without it, the screen protector is the problem. Replace it with a high-quality tempered glass protector.
Fix 3 — Restart in Safe Mode:
Press and hold the power button → long-press “Power Off” → tap “Safe Mode.” If touch works fine in Safe Mode, a third-party app is causing the problem. Uninstall recently installed apps one by one until you find the culprit.
Fix 4 — Check for water damage:
If your phone got wet recently, water inside the digitizer layer causes ghost touches and unresponsive areas. Put the phone in a dry room (not rice — that’s a myth) and let it dry completely for 24-48 hours. A silica gel packet is more effective than rice.
Fix 5 — Samsung Touch Sensitivity setting:
Samsung Galaxy phones have a touch sensitivity setting. Go to Settings → Display → Touch Sensitivity and toggle it on. This is designed for use with screen protectors and makes the digitizer more sensitive to light touches.
Fix 6 — Calibrate the touchscreen:
On some Android phones, dial *#*#2664#*#* to open the touch screen diagnostic tool. This lets you test and sometimes recalibrate touch response.
Fix 7 — Factory Reset:
If software is causing phantom touches or dead zones, a factory reset often resolves it permanently. This is especially true if the problem started after an Android update.
6. Android Phone Keeps Restarting
![]()
Your phone keeps shutting off and restarting by itself. Sometimes it gets stuck in a reboot loop and never fully starts up. Here’s how to break the cycle.
Why Android Keeps Restarting
Corrupted app, failing battery that can’t sustain load spikes, software crash, bad Android update, corrupted system cache, and in hardware cases — a loose battery connection on older phones.
Restart Loop Fixes
Fix 1 — Boot into Safe Mode:
Power off your phone completely. Then hold the Power button, and when the logo appears, hold the Volume Down button until the phone boots. If “Safe Mode” appears in the corner, you’re in. If the phone is stable in Safe Mode, a third-party app is causing the restart. Uninstall recently installed apps.
Fix 2 — Clear the system cache partition:
Turn off your phone. Hold Power + Volume Up (on most Android phones) until the Recovery Menu appears. Use volume buttons to navigate to “Wipe Cache Partition” and confirm with the power button. This deletes temporary system files that can cause boot loops without touching your personal data.
Fix 3 — Check battery health:
A battery that’s failing often causes random shutdowns and restarts — especially when the phone is under load. Install AccuBattery to check battery health. If it’s below 70%, the battery is likely causing the restarts.
Fix 4 — Uninstall recent apps:
If restarts started after installing a new app, uninstall it. Go to Settings → Apps → Sort by install date to find recently installed apps.
Fix 5 — Factory Reset:
If nothing else works, a factory reset is necessary. In Recovery Mode, navigate to “Factory Reset / Wipe Data”. This will erase everything but should solve persistent boot loop issues.
Fix 6 — Flash stock firmware (advanced):
If even factory reset doesn’t help, the Android firmware itself may be corrupted. Visit your phone manufacturer’s support page (Samsung’s Odin tool for Galaxy phones, Google’s Android Flash Tool for Pixel) to flash official firmware.
7. Android Wi-Fi Not Working
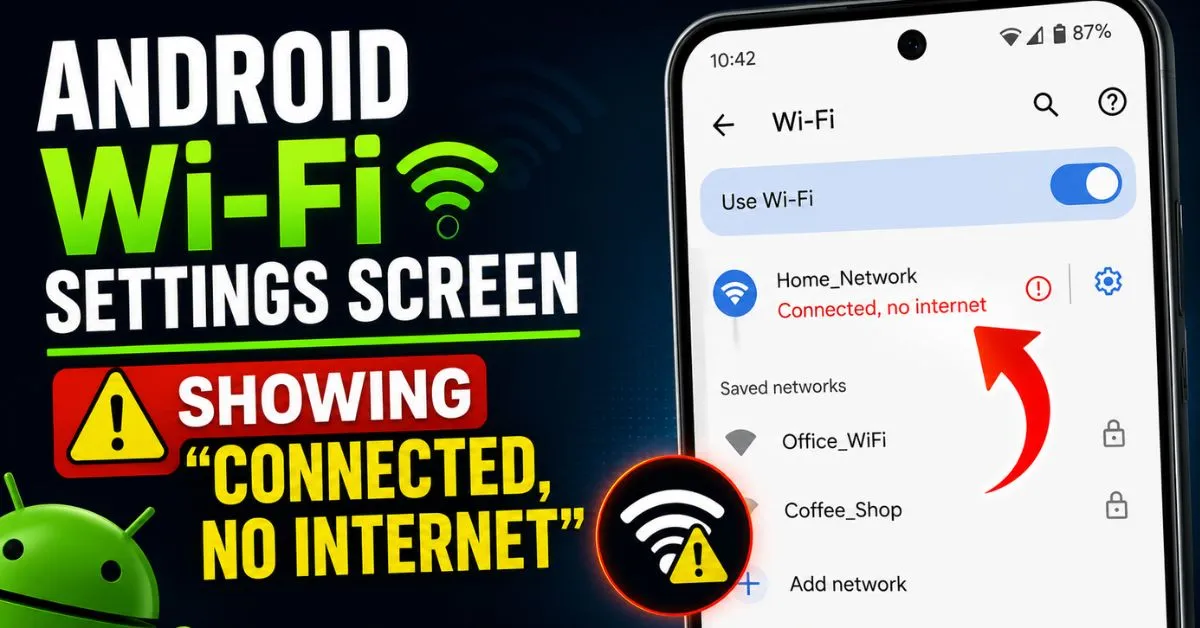
Wi-Fi connected but no internet? Wi-Fi keeps disconnecting? Can’t find your network? Every Wi-Fi problem has a fix — here they are.
Wi-Fi Problem Types
- Connected but no internet access
- Wi-Fi keeps disconnecting every few minutes
- Can’t find the Wi-Fi network
- Authentication error when connecting
- Slow Wi-Fi speed despite good signal
- Stuck on “Obtaining IP Address”
Wi-Fi Fix Guide
Fix 1 — Toggle Wi-Fi off and on:
Pull down the notification shade and toggle Wi-Fi off. Wait 10 seconds. Turn it back on. This forces your phone to re-establish the connection and solves 30% of Wi-Fi problems instantly.
Fix 2 — Forget and reconnect:
Go to Settings → Wi-Fi → [Your Network] → Forget. Then reconnect by entering your password fresh. Sometimes the saved network credentials become corrupted.
Fix 3 — Restart your router:
Unplug your router for 30 seconds and plug it back in. Wait 2 minutes for it to fully restart. This solves “connected but no internet” problems caused by router IP conflicts.
Fix 4 — Fix “Obtaining IP Address” loop:
Go to Settings → Wi-Fi → [Your Network] → Modify Network → IP Settings → change from DHCP to Static. Enter IP: 192.168.1.100, Gateway: 192.168.1.1, DNS 1: 8.8.8.8, DNS 2: 8.8.4.4. This bypasses IP assignment problems.
Fix 5 — Change DNS servers:
Go to Settings → Wi-Fi → [Your Network] → Advanced → Private DNS. Enter dns.google or 1.1.1.1. Google’s and Cloudflare’s DNS servers are faster and more reliable than most ISP DNS servers.
Fix 6 — Reset network settings:
Go to Settings → General Management → Reset → Reset Network Settings. This resets all Wi-Fi passwords, Bluetooth connections, and mobile data settings. You’ll need to reconnect to all networks, but it fixes persistent Wi-Fi issues caused by network configuration corruption.
Fix 7 — Fix Wi-Fi keeps disconnecting:
Go to Settings → Wi-Fi → [Your Network] → Keep Wi-Fi on During Sleep → Always. Also disable Wi-Fi Power Saving Mode in Developer Options — this feature disconnects Wi-Fi when the screen is off to save battery, but it causes problems on some phones.
8. Android Bluetooth Not Connecting
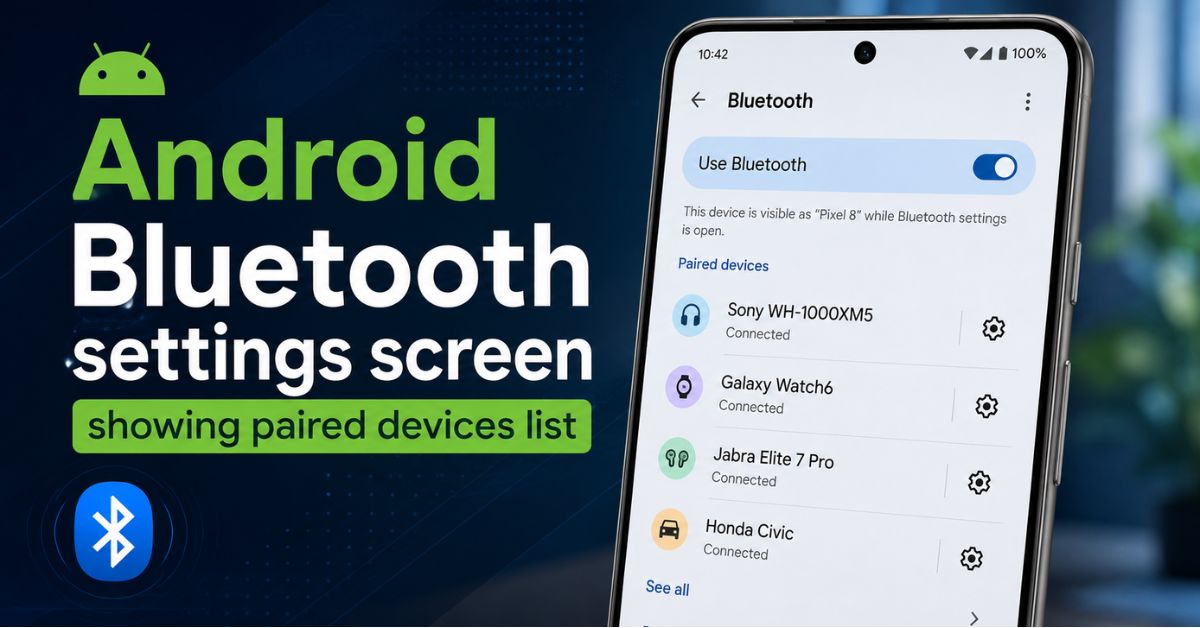
Bluetooth won’t pair, keeps disconnecting, or won’t connect to your car or headphones. Here’s how to fix every Android Bluetooth problem.
Bluetooth Fix Guide
Fix 1 — Toggle Bluetooth off and on:
Pull down the notification shade, toggle Bluetooth off, wait 10 seconds, toggle back on. Simple but surprisingly effective.
Fix 2 — Forget and re-pair the device:
Go to Settings → Connected Devices → Bluetooth → [Device Name] → Forget. Then put your headphones or speaker back in pairing mode and reconnect from scratch. Corrupted pairing data is a common cause of Bluetooth refusing to connect.
Fix 3 — Clear Bluetooth cache
Go to Settings → Apps → Show System Apps → Bluetooth → Storage → Clear Cache. This clears corrupted Bluetooth data without removing your paired devices.
Fix 4 — Fix car Bluetooth issues:
Delete the pairing on both your phone AND your car’s infotainment system. Most cars have a “Delete Device” option in the Bluetooth menu. Then re-pair from scratch — always initiate the connection from your phone, not the car.
Fix 5 — Check for interference:
Bluetooth operates on the 2.4GHz frequency — the same as Wi-Fi, microwaves, and many other devices. If Bluetooth keeps dropping in a specific location, try turning off Wi-Fi temporarily to test if there’s interference.
Fix 6 — Update your headphones firmware:
Many Bluetooth headphones (AirPods, Sony, Bose, JBL) have companion apps with firmware updates. An outdated headphone firmware is a common cause of Bluetooth disconnects with newer Android versions.
Fix 7 — Reset network settings:
Same as the Wi-Fi fix — Settings → General Management → Reset → Reset Network Settings resets Bluetooth along with Wi-Fi. This is the nuclear option for persistent Bluetooth problems.
9. Android Phone Black Screen
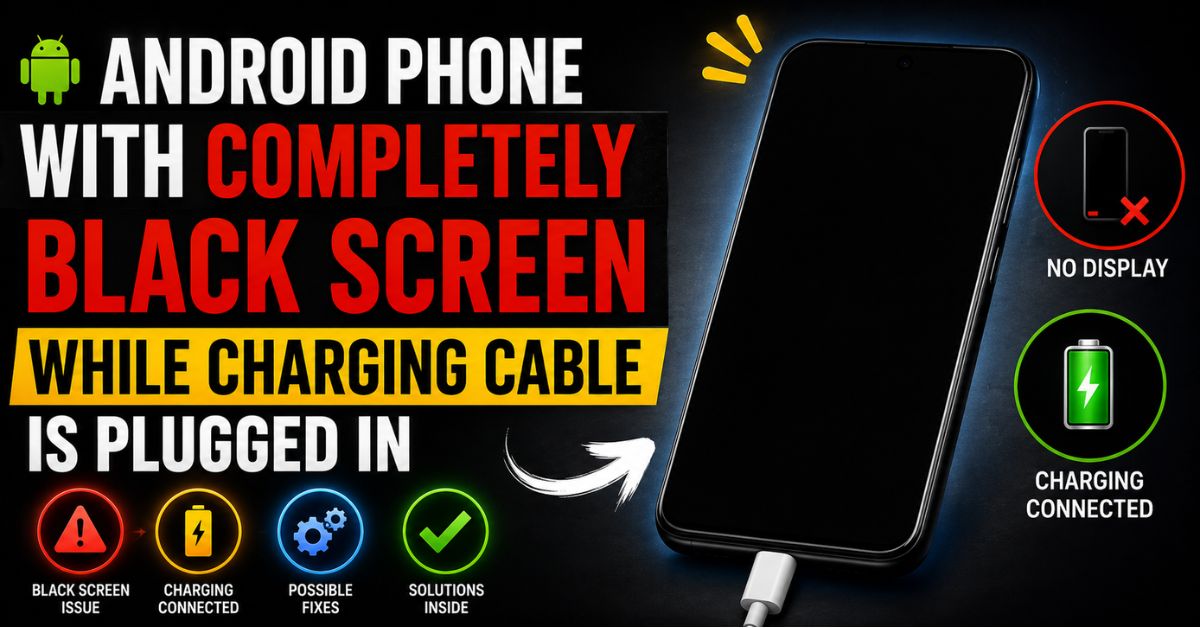
Your phone has a black screen but you can hear notifications, feel vibrations, or see the charging light. The phone is on — the screen just isn’t showing anything. Here’s how to fix it.
Black Screen Causes
Screen hardware failure, software crash, proximity sensor stuck (thinks phone is against your ear), bootloop with black screen, and battery completely drained.
Black Screen Fix Guide
Fix 1 — Force restart:
Hold the Power + Volume Down buttons simultaneously for 10-15 seconds. On Samsung Galaxy: hold Power + Volume Down until the screen flashes and restarts. This is a hard reset that clears a crashed Android process without wiping data.
Fix 2 — Charge the phone:
If the battery is completely dead (below 1%), the screen may stay black for several minutes after plugging in. Connect to a wall charger (not USB computer port) and wait 15-20 minutes before trying to power on.
Fix 3 — Check proximity sensor:
The proximity sensor (near the top earpiece) turns off your screen during calls. If it’s stuck or covered, the screen stays black. Go to Settings → Accessibility → Touch → disable Proximity Sensor temporarily. Also wipe the top of the phone to remove any oil covering the sensor.
Fix 4 — Boot into Safe Mode:
If the screen comes on when you boot into Safe Mode (hold Volume Down during startup), a third-party app is causing the black screen. Uninstall recently added apps.
Fix 5 — Boot into Recovery Mode:
Hold Power + Volume Up to enter Recovery Mode. Navigate to Wipe Cache Partition. If the recovery screen shows — your screen hardware is fine and the problem is software.
Fix 6 — Connect to external display:
If you need to access data on a phone with a black screen, connect it to a TV or monitor via USB-C (if your phone supports DisplayPort). This lets you use the phone even with a broken screen to back up photos and data.
10. “Unfortunately, App Has Stopped” Error
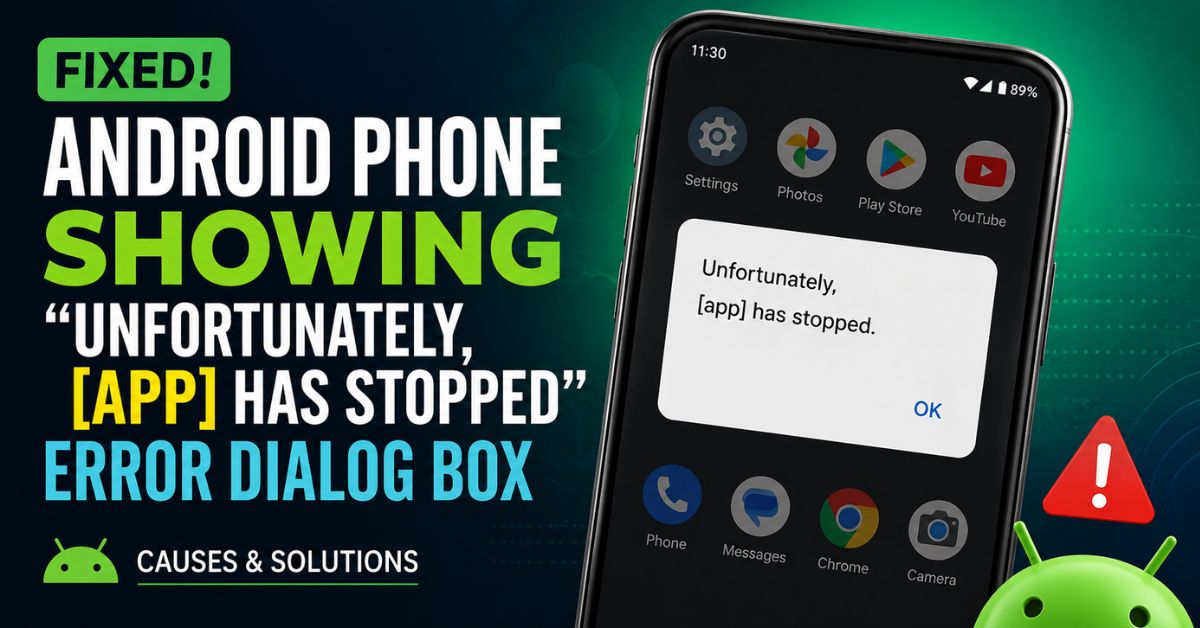
“Unfortunately, [App Name] has stopped.” This error appears when an app crashes. Here’s how to fix it permanently.
Fix Guide
Fix 1 — Force stop and reopen:
Go to Settings → Apps → [App Name] → Force Stop. Then reopen the app. This clears the current crashed state.
Fix 2 — Clear app cache:
Go to Settings → Apps → [App Name] → Storage → Clear Cache. Corrupted cache files are the most common cause of app crashes.
Fix 3 — Clear app data:
If clearing cache doesn’t help, go to Settings → Apps → [App Name] → Storage → Clear Data. Note: this logs you out of the app and resets all settings within it. It’s like a fresh install without uninstalling.
Fix 4 — Update the app:
Open Google Play Store → search for the app → tap Update if available. App crashes are often fixed in newer versions.
Fix 5 — Uninstall updates:
For system apps like Google Play Services or Settings, you can’t clear data normally. Instead: Settings → Apps → [App] → three-dot menu → Uninstall Updates. This rolls back to the factory version which is usually more stable.
Fix 6 — Check available storage:
Apps crash when they can’t write temporary data. If your storage is over 90% full, apps will crash constantly. Free up storage as described in Section 3.
Fix 7 — Reinstall the app:
Uninstall the app completely and reinstall from Google Play Store. This gives you a completely clean install with no corrupted files.
11. Google Play Store Not Working
![]()
Play Store won’t open, can’t download apps, downloads stuck, or error codes appearing. Here’s the complete Google Play Store fix guide.
Play Store Fix Steps
Fix 1 — Clear Play Store cache and data:
Settings → Apps → Google Play Store → Storage → Clear Cache → Clear Data Then do the same for: Google Play Services → Clear Cache
Fix 2 — Remove and re-add Google account:
Go to Settings → Accounts → Google → Remove Account. Restart your phone. Add the account again. This refreshes your authentication token with Google’s servers.
Fix 3 — Check date and time:
An incorrect date/time causes SSL certificate errors that prevent Play Store from connecting to Google’s servers. Go to Settings → General Management → Date and Time → enable Automatic Date and Time.
Fix 4 — Fix error code 963/504/495:
These are download queue errors. Go to Settings → Apps → Google Play Store → Force Stop → Clear Data. Then go to Settings → Apps → Download Manager → Enable (if disabled). Restart and try downloading again.
Fix 5 — Check available storage:
Play Store won’t download if your storage is full. Delete photos, videos, and unused apps to free up space. You need at least 500MB free for app downloads.
Fix 6 — Reset app preferences:
Go to Settings → Apps → three-dot menu → Reset App Preferences. This re-enables all disabled apps that Play Store may depend on.
12. Android Camera Not Working
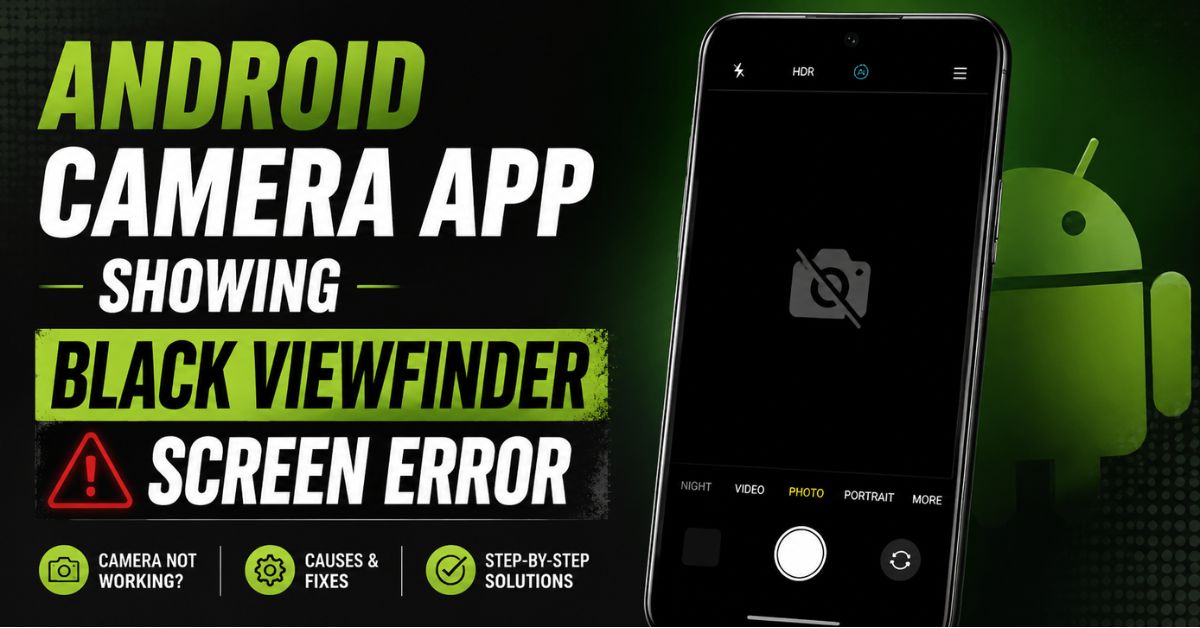
Camera shows a black screen, crashes immediately, takes blurry photos, or says “Camera failed.” Here’s how to fix every Android camera problem.
Camera Fix Guide
Fix 1 — Clear camera app cache:
Settings → Apps → Camera → Storage → Clear Cache. This is the first fix for black screen and “Camera failed” errors.
Fix 2 — Restart in Safe Mode:
If camera works in Safe Mode but not normally, a third-party camera or photo app is interfering. Uninstall recent photo-related apps.
Fix 3 — Check if another app is using the camera:
Android only allows one app to use the camera at a time. If a video call app (Zoom, Teams, WhatsApp) is running in the background, it may have locked the camera. Close all other apps and try again.
Fix 4 — Fix blurry camera:
Wipe the camera lens with a microfiber cloth. Fingerprints and dust on the lens are responsible for 80% of “suddenly blurry” camera complaints. If the lens is scratched, autofocus may have difficulty — try tapping the subject in the viewfinder to force focus.
Fix 5 — Fix front camera not working:
Front camera failures are often caused by a cracked or dirty selfie lens, or by a third-party app that has locked camera permissions. Go to Settings → Apps → [App] → Permissions → Camera → Deny for any suspicious app.
Fix 6 — Factory Reset:
Persistent “Camera failed” errors that survive a cache clear almost always require a factory reset. The camera hardware is fine — it’s a system-level software conflict.
13. Android Not Receiving Calls or Texts
People are calling you but your phone doesn’t ring. Texts arrive hours late or not at all. Here’s how to fix Android call and text reception problems.
Fix Guide
Fix 1 — Check Do Not Disturb:
The most common cause. Swipe down and check if the moon icon (Do Not Disturb) is active. If it is, tap it to disable. Also check Settings → Sound → Do Not Disturb → Schedules for any active automatic schedules.
Fix 2 — Check call forwarding:
Dial *#21# and press call. If call forwarding is active, all calls are being redirected to another number. Dial ##21# to disable call forwarding.
Fix 3 — Re-enable your SIM:
Go to Settings → Connections → SIM Card Manager. If your SIM shows as disabled, enable it. Also try removing the SIM card, cleaning the contacts with a dry cloth, and reinserting it.
Fix 4 — Fix texts arriving late:
Late texts are usually a carrier issue, but you can fix it by going to Settings → Apps → Messages → Storage → Clear Cache. Also disable battery optimization for Messages: Settings → Apps → Messages → Battery → Unrestricted.
Fix 5 — Reset network settings:
Settings → General Management → Reset → Reset Network Settings. This fixes carrier configuration issues that cause missed calls.
Fix 6 — Contact your carrier:
If none of the above works, your SIM card may be faulty or your account may have a billing issue that’s restricting service. Contact AT&T, Verizon, T-Mobile, or your carrier directly.
14. Android Stuck on Boot Screen
![]()
Your Android phone turns on, shows the logo, then freezes or restarts without ever fully booting. This is called a bootloop. Here’s how to escape it.
Boot Screen Fix Guide
Fix 1 — Force restart:
Hold Power + Volume Down for 15-20 seconds. Some phones need up to 30 seconds. This often breaks a simple bootloop caused by a software crash.
Fix 2 — Wipe cache partition:
Boot into Recovery Mode (Power + Volume Up). Navigate to Wipe Cache Partition. This deletes temporary system files that can cause boot issues without touching personal data.
Fix 3 — Boot in Safe Mode:
If the phone boots successfully in Safe Mode, a third-party app is the cause. In Safe Mode, go to Settings → Apps and uninstall recently installed apps, especially any system optimizer, cleaner, or security apps.
Fix 4 — Factory Reset via Recovery:
In Recovery Mode, navigate to Wipe Data/Factory Reset. This will erase all data but should solve persistent bootloops. Make sure to back up data first if possible.
Fix 5 — Flash stock firmware:
If factory reset doesn’t fix the bootloop, the firmware is corrupted. Samsung users can use Odin to flash official firmware. Pixel users can use Android Flash Tool at flash.android.com.
15. Android Microphone Not Working
![]()
People can’t hear you on calls. Voice recording is silent. Google Assistant says it can’t hear you. Here’s how to fix Android microphone problems.
Microphone Fix Guide
Fix 1 — Check microphone hole for blockage:
The microphone is usually a tiny hole at the bottom of the phone, next to the charging port. Check if it’s covered with a phone case, debris, or if the case is partially blocking it. Clean gently with a dry toothpick.
Fix 2 — Check app permissions:
Go to Settings → Privacy → Permission Manager → Microphone. Ensure the app you’re using (Phone, WhatsApp, Zoom) has microphone permission set to “Allow while using the app.”
Fix 3 — Test in a different app:
Open the Voice Recorder app and record a test message. If the recording is silent, it’s a hardware or system issue. If recording works, the problem is with a specific app’s permissions.
Fix 4 — Clear Phone app cache:
Settings → Apps → Phone → Storage → Clear Cache. Also clear cache for any calling app you use.
Fix 5 — Check for headphone mode stuck:
If your phone thinks headphones are plugged in, it may be routing audio to a non-existent headphone mic. Try plugging in and unplugging headphones several times, or restart your phone.
16. Android GPS Not Working
Google Maps shows your location in the wrong place. GPS takes forever to lock. Navigation keeps losing signal. Here’s how to fix Android GPS.
GPS Fix Guide
Fix 1 — Enable High Accuracy mode:
Go to Settings → Location → Location Services → Google Location Accuracy → Improve Location Accuracy → ON. Also make sure Location Mode is set to “High Accuracy” (uses GPS + Wi-Fi + mobile networks).
Fix 2 — Toggle location off and on:
Pull down notification shade → toggle Location off → wait 10 seconds → toggle back on. This resets the GPS chip.
Fix 3 — Clear GPS data:
Install the free app GPS Status & Toolbox from Google Play. Tap the download icon to reset your AGPS data. This forces your phone to download fresh satellite data and dramatically speeds up GPS lock time.
Fix 4 — Check for physical obstruction:
GPS signals can’t penetrate metal. If you’re using a metal phone case or car holder with metal plates, your GPS accuracy will be terrible. Switch to a plastic case.
Fix 5 — Update Google Maps:
Outdated Google Maps can have GPS bugs. Update via Play Store. Also clear Google Maps cache: Settings → Apps → Maps → Storage → Clear Cache.
17. Android Phone Won’t Turn On
Your Android phone is completely unresponsive. Pressing the power button does nothing. Screen stays black. Here’s how to bring it back to life.
Won’t Turn On Fix Guide
Fix 1 — Charge for 20 minutes first:
If the battery is completely dead, the phone won’t respond at all for the first 10-20 minutes of charging. Connect to a wall charger (not a laptop USB port — it’s too slow). Wait 20 minutes before pressing power.
Fix 2 — Force restart:
Hold Power + Volume Down for 15-30 seconds. This works even when the screen appears completely dead.
Fix 3 — Try a different charger:
A faulty charger or cable may not be delivering power at all. Try a different cable and adapter. The charging light or icon should appear within 5 minutes of connecting.
Fix 4 — Check for hardware damage:
If the phone was dropped or got wet, there may be physical damage. Look for cracks, bent frame, or corrosion in the charging port. These require professional repair.
18. Android Storage Full Fix
“Insufficient storage available.” Your phone is full and you can’t download apps, take photos, or update anything. Here’s how to free up Android storage fast.
Storage Fix Guide
Fix 1 — Use Files by Google:
Download Files by Google from the Play Store. Tap the “Clean” tab — it finds blurry/duplicate photos, large files, meme folders, and downloaded files you’ve forgotten about. Most people free up 2-5GB in their first cleanup.
Fix 2 — Move photos to Google Photos:
Install Google Photos and enable backup. Once photos are safely backed up to the cloud, you can delete them from your phone. This is the single most effective way to free up massive storage.
Fix 3 — Clear app caches:
Go to Settings → Storage → Other Apps → Sort by Size. The top apps are your biggest storage consumers. Tap each one and clear the cache.
Fix 4 — Delete downloaded files:
Open your Downloads folder (Files app → Downloads). Most people have hundreds of PDFs, APKs, and documents downloaded years ago that they’ll never open again.
Fix 5 — Delete offline content:
Check Spotify (downloaded songs), Netflix (downloaded shows), YouTube (downloaded videos), Google Maps (offline maps), and Podcast apps. Offline content from streaming apps can consume 5-20GB of storage.
19. Android After Update Problems
![]()
Your phone was fine until the update. Now it’s slow, battery dies fast, Wi-Fi disconnects, or apps crash. Here’s what to do after a bad Android update.
Post-Update Fix Guide
Fix 1 — Wait 48 hours:
After every major Android update, the system re-indexes files, reoptimizes apps, and runs background maintenance tasks. This is normal and causes temporary slowdowns and battery drain. Give it 48 hours before deciding the update is the problem.
Fix 2 — Wipe cache partition:
Boot into Recovery Mode (Power + Volume Up) → Wipe Cache Partition. This clears outdated cache files from the old Android version that can conflict with the new one.
Fix 3 — Check for follow-up update:
Go to Settings → About Phone → Software Update. Manufacturers often release quick bug-fix patches within days of major updates. Install any available update.
Fix 4 — Reset app preferences:
Settings → Apps → Reset App Preferences. Updates can change app defaults in ways that cause problems. Resetting preferences restores sensible defaults.
Fix 5 — Factory Reset as last resort:
If the phone is genuinely unusable after an update and nothing fixes it, a factory reset with a fresh install of the new Android version is the most reliable solution.
Frequently Asked Questions
How do I fix an Android phone that keeps crashing?
Start by booting in Safe Mode (hold Volume Down during startup). If the phone is stable in Safe Mode, a third-party app is causing crashes — uninstall recently added apps. If crashes happen in Safe Mode too, wipe the cache partition in Recovery Mode. If still crashing, perform a factory reset.
Why is my Android phone so hot?
Heat is generated by heavy CPU/GPU use, fast charging, or a background process running at full power. Check Battery Usage (Settings → Battery) for any app using excessive resources. Also check if you’re in an area with weak signal — your phone’s radio works harder to maintain connection in low-signal areas, generating significant heat.
How do I speed up my slow Android?
The fastest improvements come from: enabling the 0.5x animation scale hack in Developer Options, clearing app caches, restricting background apps, and keeping at least 20% storage free. These four changes alone make most phones feel significantly faster.
Why does my Android battery die so fast?
Background apps are almost always the culprit. Go to Settings → Battery → Battery Usage and identify which app is using the most power. Restrict its background activity. Also check location permissions — apps with “Allow all the time” location access are constantly draining battery.
How do I fix Android Wi-Fi that keeps disconnecting?
Go to Settings → Wi-Fi → your network → Modify → IP Settings → change to Static IP (use 192.168.1.100 with DNS 8.8.8.8). Also disable Wi-Fi Power Saving in Developer Options, which disconnects Wi-Fi when the screen is off.
Is it worth factory resetting my Android?
Yes — if you’ve had your Android for 2+ years and it’s slow, constantly crashing, or behaving strangely, a factory reset often makes it feel like a new phone. Always back up to Google Photos and verify your Google account credentials before resetting. The process takes about 20 minutes.
How do I know if my Android has malware?
Signs include: phone hot when idle, battery draining unusually fast even in standby, unfamiliar apps in your app list, pop-up ads appearing outside of browsers, and unexplained data usage. Run a scan via Google Play Store → Profile → Play Protect → Run Scan.
Why won’t my Android update?
Usually due to insufficient storage (need at least 1-2GB free), poor Wi-Fi connection, or a Google account authentication issue. Free up storage, connect to stable Wi-Fi, and try again. If the update keeps failing, clear Google Play Store cache and data.
How do I fix Android Bluetooth that keeps disconnecting?
Forget the device and re-pair it from scratch. Also clear Bluetooth cache: Settings → Apps → Show System Apps → Bluetooth → Storage → Clear Cache. For car Bluetooth specifically, delete the pairing from both the phone AND the car’s infotainment menu before re-pairing.
What should I do if my Android phone won’t turn on?
Connect to a wall charger and wait 20 minutes — a completely dead battery takes time to show any sign of life. Then hold Power + Volume Down for 15-30 seconds for a force restart. If it still won’t respond, try a different charger and cable.
Final Thoughts
Android phones are powerful but complex devices. Most problems — from battery drain to boot loops — have real software solutions that you can apply yourself in minutes.
The key is diagnosing the problem correctly first. Use the Battery Usage screen to identify battery problems. Use Safe Mode to identify app-related crashes. Use Recovery Mode for deeper system issues.
If you’ve tried all the fixes in a section and the problem persists, a factory reset solves the vast majority of persistent Android software issues. It takes 20 minutes and makes your phone feel new.
Related Guides on Device Fix Zone
- 📱 Android Phone Not Charging? Try These Fixes First
- 🐌 Why Is My Android Phone So Slow? 7 Real Fixes
- 🔋 Android Battery Draining Fast? 10 Settings to Change