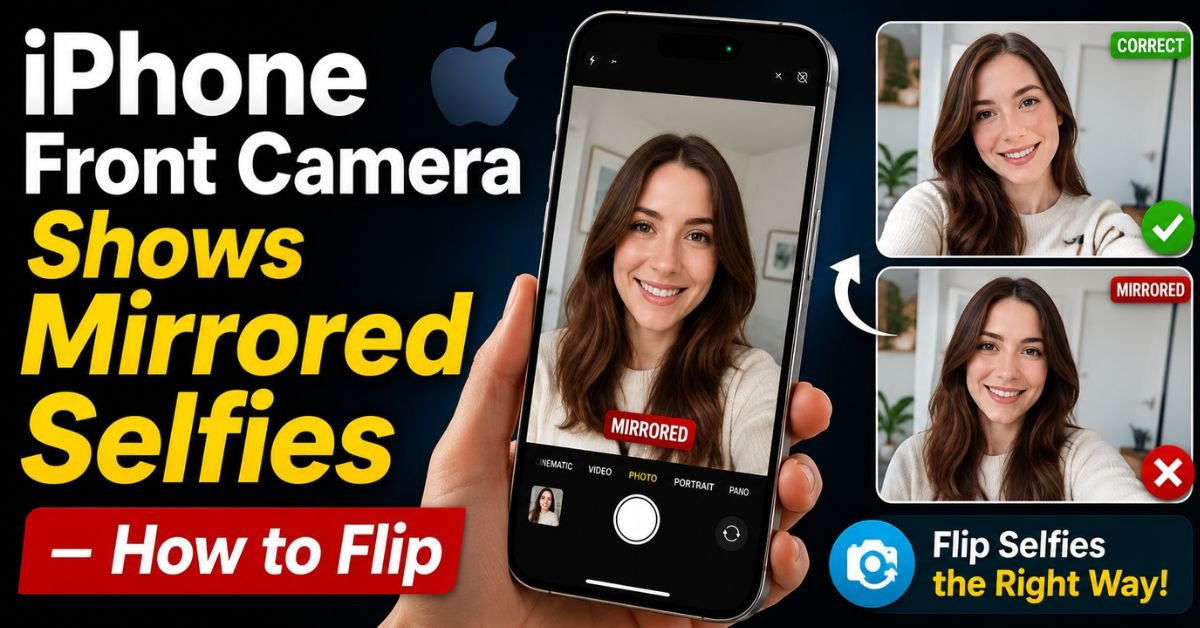
I still remember the first time I noticed my iPhone was “lying” to me. I had just finished a killer workout, was wearing my favorite graphic tee that says “Keep Going,” and snapped a quick selfie in the gym mirror. When I looked at the photo in my library afterward, two things hit me. First, I looked… weird. Second, the text on my shirt was backward.
It wasn’t just that the text was unreadable; my face looked slightly asymmetrical in a way I didn’t recognize. If you’ve ever felt like you look great in the camera preview but look like a total stranger the moment you hit the shutter button, you aren’t alone. It’s one of the most common complaints I get from readers.

The “Mirrored Selfie” issue is a mix of human psychology, default Apple software choices, and the technical evolution of the TrueDepth camera system. Since iOS 14, Apple finally gave us a native way to fix this without needing third-party apps. Let’s dive into why this happens and how you can reclaim your face.
Introduction: Why Your Selfies Look Backward
There is a psychological reason why we prefer the “mirrored” version of ourselves. It’s called the Mere Exposure Effect. Since you spend your whole life looking at yourself in bathroom mirrors, your brain has hard-coded that reversed image as “the real you.”
When your iPhone saves a photo, it defaults (usually) to the “natural” orientation—the way a person standing in front of you would see you. Because most human faces are slightly asymmetrical, seeing the non-mirrored version of yourself feels “off.” It’s like the Uncanny Valley, but for your own nose and jawline.
There is a big difference between Mirror Preview and the Saved Image. The preview on your screen acts like a mirror because trying to fix your hair or adjust your pose using a non-mirrored screen is a cognitive nightmare. Try moving your hand to the left and seeing it move to the right on screen; it’s frustrating. So, Apple shows you a mirror to help you pose, but then “flips” the image when saving it to reflect reality.
Real-World Scenarios: When Mirroring Ruins the Shot
Sometimes, the mirrored look isn’t just about vanity; it’s about the photo actually making sense.
I recently took a photo of a friend holding a “Happy Birthday” sign. In the preview, everything looked great. We hit the button, checked the Photo App, and the sign looked like it was written in some forgotten ancient script. Total buzzkill.

Then there’s the “T-shirt problem.” If you’re wearing a brand or a band tee, a mirrored selfie makes you look like you’re wearing a knock-off from a parallel dimension.
Another scenario is the “Leaning Tower” effect. If you’re posing next to a landmark—say, the Statue of Liberty—and you want it on your left side, a mirrored save might throw the entire composition of the image out of whack. The frustration usually peaks when the preview looks perfect, but the moment the shutter clicks, the iOS post-processing kicks in and flips the image, moving your “good side” to the other side of the frame.
The Step-by-Step Fix: Using iOS Settings
If you are tired of manually flipping every photo, you can change the default behavior. This was the “holy grail” update that arrived with iOS 14. If you’re on an iPhone 12, iPhone 13, or any modern device running updated software, this is your go-to move.
Here is exactly how to do it:
- Open the Settings App: Tap that grey gear icon on your home screen.
- Scroll Down to Camera: You’ll have to scroll past the main blocks of apps (Mail, Notes, Messages) until you find the Camera section.
- Find the Composition Header: Inside the Camera settings, look for the section titled “Composition.”
- Toggle ‘Mirror Front Camera’: You will see a switch for Mirror Front Camera.
- If the switch is ON (Green): Your selfies will be saved exactly as you see them in the preview (the “Mirror” look).
- If the switch is OFF (Grey): Your selfies will be flipped/inverted after you take them to show the “Natural” look.
I personally keep mine ON. I’ve spent 30 years looking at myself in a mirror; I’m not about to start learning what I look like to everyone else now.
Expert Insight: The ‘Natural’ vs. ‘Mirror’ Debate
Pro Tip: If you are a content creator or influencer, I highly recommend keeping the Mirror Front Camera toggle ON. Why? Because when you’re demonstrating a product or pointing to something in the background, your movements in the final video or photo will match what you intended while filming. It makes the “tactile” experience of creating content much more intuitive.
How to Flip Existing Selfies: Hands-on Editing Tips
What if you already have a library full of “backward” photos that you want to fix? You don’t need to download some sketchy ad-filled “Photo Flip” app from the App Store. Apple’s built-in Photo App has a powerful Crop Tool that handles this in seconds.

The Workflow for Individual Photos:
- Open the photo you want to fix in the Photos App.
- Tap Edit in the top right corner.
- Tap the Crop/Rotate icon at the bottom (it looks like a square with two arrows).
- Look at the top left corner of the screen. You’ll see a icon that looks like a triangle bisected by a vertical line. This is the Flip Horizontal tool.
- Tap it. Boom. Your photo is now flipped.
- Hit Done.
Batch Editing (The Secret Time-Saver): If you have twenty selfies from a beach trip that all need flipping, don’t do them one by one.
- In your library, tap Select and highlight all the photos.
- Tap the three dots (ellipsis) in the bottom right.
- Note: While iOS doesn’t have a direct “Batch Flip” button in the standard menu yet, you can create a simple Shortcut in the “Shortcuts” app to “Flip Image” and apply it to a selection. It’s a bit of a power-user move, but it saves hours.
Common Pitfalls: Why the Setting Might Be Missing
I’ve had readers message me saying, “I went to Settings > Camera, and the Mirror Front Camera option isn’t there!”
There are usually three reasons for this:
- Old iOS Version: This feature requires iOS 14 or later. If you are rocking an older device like an iPhone 6 or an original SE that can’t update to iOS 14, you simply won’t have this toggle. You’ll have to rely on the manual editing method mentioned above.
- Hardware Limitations: Even if you have iOS 14, some very old models (like the iPhone 5s) didn’t get the toggle because of how the camera API was structured back then. However, for anyone on an iPhone 12 or newer, it’s definitely there.
- Third-Party Apps: This is the big one. If you take a selfie inside Instagram, Snapchat, or TikTok, these apps often ignore your system settings. Instagram, for example, usually mirrors the preview but saves the “natural” view by default—or vice versa depending on their latest update. If you want consistency, always take your photos in the native iOS Camera app and then import them into your social apps.
Pro Tips for Perfect iPhone Selfies
Getting the orientation right is only half the battle. If you want your selfies to look professional, keep these “hands-on” lessons in mind:
- The Volume Button Hack: Don’t try to tap the on-screen shutter button while stretching your arm out. It causes “micro-shakes” that blur the image. Use the Volume Up button on the side of your iPhone to snap the photo. It feels more like a real camera shutter.
- Focus and Exposure Lock: Before you snap, tap and hold on your face on the screen until you see “AE/AF LOCK” in yellow. This prevents the camera from hunting for focus or changing the brightness if someone walks behind you.
- The TrueDepth Advantage: If you have a newer iPhone (X and later), use Portrait Mode for selfies. The TrueDepth camera uses infrared sensors to map your face in 3D, creating a much more natural “bokeh” (background blur) than software-only solutions.
- Clean Your Lens: This sounds silly, but your front camera is constantly being touched by your ear during phone calls. It’s covered in skin oils. Give it a quick wipe with your shirt before a selfie. It turns a “dreamy/blurry” photo into a crisp, high-end shot instantly.
Frequently Asked Questions
Why does my face look crooked when I flip the selfie?
This is perfectly normal! Most faces are asymmetrical. One eye might be slightly higher, or your jaw might lean a certain way. You are used to seeing the mirrored version, so the “natural” version looks like a distorted stranger. If you want to feel more confident, keep the Mirror Front Camera setting turned ON.
Does flipping a photo reduce the quality?
No. When you use the Flip Horizontal tool in the Photos app, you aren’t re-compressing the image in a way that loses detail. It’s a simple metadata change in the orientation. Your pixels remain just as sharp as they were when you took the shot.
Why does the camera preview change right after I take the photo?
This happens when Mirror Front Camera is turned OFF. The iPhone shows you a mirror while you’re posing because it’s easier to frame the shot. The moment you hit the shutter, the Image Orientation is “corrected” to show how the world sees you. If this sudden change annoys you, go to Settings > Camera and turn on the Mirror toggle.
Can I flip a video after I’ve recorded it?
Yes! Just like a photo, you can open a video in the Photos App, tap Edit, go to the Crop tool, and hit the Flip icon in the top left. iOS will process the video and save the mirrored version. This is a lifesaver for “Get Ready With Me” videos where text on products is backward.
Will this setting affect my FaceTime calls?
No, the Mirror Front Camera setting only applies to the Camera app. FaceTime (and most video call apps) will always show you a mirrored view of yourself because it would be too disorienting to use otherwise. However, the person on the other end of the call always sees you in the “natural” (non-mirrored) orientation.
By taking control of your Camera Settings and understanding the Post-processing quirks of iOS, you can stop the “Why do I look like that?” mini-crisis every time you take a photo. Whether you prefer the mirror look or the “true” look, the power is finally in your hands—and your Settings app.